0. CMOS/BIOS SETTINGS (Hit DEL or F2 during startup, according to prompt)Ensure that boot sequence is CD-ROM, Floppy, Hard DriveEnsure that Plug-and-Play (PNP) OS is enabled
 1a. If computer is incapable of booting from CDROM, then first prepare four install floppies, using CDROM. Boot from floppy, and it will prompt to load all four into RAM. (This procedure takes about 10 minutes.) Insert Windows 2000 Full Install CDROM.
1b. Otherwise, insert Windows 2000 Full Install CDROM and reboot.
2. Hit ENTER to install Windows 2000.
3. Hit C to continue.
4. Hit the F8 key to agree to license agreement.
5. Hit D to delete any existing disk partitions.
6. Hit C to create new partition.
7. Hit ENTER to accept the default (one big partition.) Note there may be some space left over. That’s OK.
8. ENTER to install windows on this partition.
9. ENTER to format the partition as NTFS.
10. Wait while the drive is formatted, files copied from the CD. The machine will reboot itself.
 11. ENTER to accept locale and keyboard settings.
12. Type computer name and school name in the appropriate slots, hit ENTER.
13. Type the computer name. Type the Administrator password TWICE. Password will show as all asterisks. ENTER.

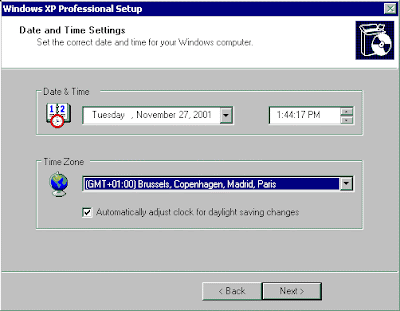
14. Modify the date, time and time zone as needed. ENTER.
15. Click to select “Custom settings”. ENTER.
16. Click to remove the check next to “File and Printer Sharing for Microsoft Networks”. ENTER.
 17. Leave “This computer is not on a network or is on a network without a domain” selected (or if a PDC is available, selected the domain option). Type EPAHS in the Workgroup (or Domain) field. ENTER.
18. Remove CD from drive. ENTER. Computer will reboot. ENTER.
19. Select “User must enter a user name and password to use this computer.” ENTER. ENTER again.
20. Log into computer as Administrator, using the password you entered in step 13. ENTER.
21. Disable the WELCOME Screen.
22. Double-click the “Connect to the Internet” icon on the desktop. Select “I want to set up my Internet connection manually, or I want to connect through a local area network (LAN).” OK.
23. Select “I connect through a local area network (LAN).” ENTER. ENTER again.
24. Select NO to setting up email. OK. OK again.
 25. Right-click on “My Network Places”. Click Properties.Right-click on “Local area network”. Click Properties.Click on “Internet Protocol (TCP/IP)” so that it turns blue. Click Properties.Select “Use the following IP address”.Type in the IP address, subnet mask, gateway and DNS addresses you wrote down before. Click OK.
26. Change the Resolution (by right clicking on the desktop and selecting Properties:24 bit True Color800 x 600Advanced -> Adapter -> Refresh Rate -> 75 HzYES ... OK ... OK ... OK ... (Joe Pesci mode)Now adjust monitor physical wheels as needed.
27. Set the ScreenSaver to show the computer name:Right-click on desktop, select Properties-> Screensaver Tab-> Text = “PC01 Welcome To EPAHS PC01”-> Speed = Medium-> Location = Random-> Font = Terminal-> Size = 72-> Wait = 10 minutes-> Color = your choiceEnergy Saver: Turn off monitor after 30 minutes
 When you get the message to "press any key to boot from CD...", press any key.( this is new on Microsoft Windows 2000 and XP CD's:if you do not press any key, it will NOT boot from CD-ROM,but boot from harddisk, so that people which "forgot" to takeout such bootbable CD-ROM's are not getting confused bythe CD-ROM installation procedure )
 Once the boot from CD-ROM has started, it will display at the top of the screen :"Setup is inspecting your computer's hardware configuration. . ."
 After a brief delay, the typical Microsoft "blue Installation screen" is displayed, with "Windows Setup" displayed at the top and at the bottom of the screen the information,that "Setup is loading Files" (loading all type of device drivers) :
It will finally state : "Setup is starting Windows" and will display after a short delay the"Windows XP Professional Setup" or "Windows XP Home Setup" screen :
 Select "to set up Windows XP now" and press the ENTER-key :
 The "Windows XP Licensing Agreement" is displayed, accept it by pressing the F8-key.(as indicated on the botton of the screen).
 If your system has already an operating system installed, you will see them listed.You have now a simple Disk Manager, allowing you to create and delete partitions. You will need to select either an existing partition or "Unpartitioned space" (if available)to define, on which partition to install Windows XP, then press ENTER.The next screen is asking for the type of disk formatting to be used :
 (if you install XP into an already existing partition, you have additional options to leave thecurrent disk formatting intact).Select the type of disk formatting :
  and will then start copying files from the CD-ROM to the disk :
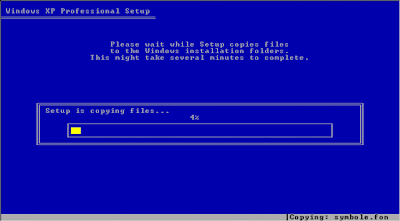
The system will then need to reboot :
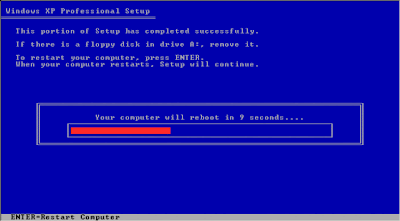 ( this is a funny screen : the system will restart anyway after 1 seconds, and you have only the choice to press ENTER to shorten the delay, saving max. 15 seconds in the complete installation process of 30-45 minutes )
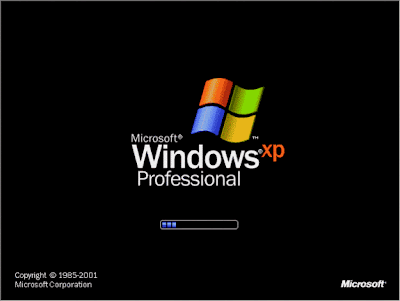
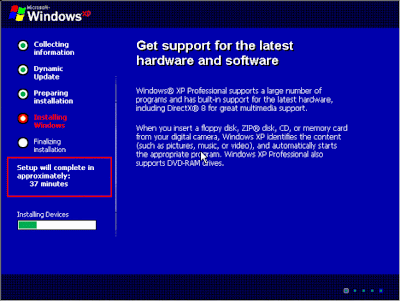
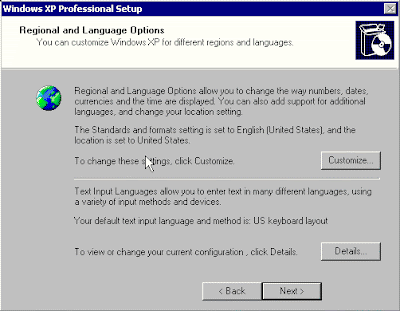
You can adjust regional settings (for example if you install an English version ofWindows XP in a different country and the keyboard layout/language is not thesame language as your copy of Windows XP, you should use the button "Customize.."and configure the proper keyboard, to make sure that you can enter in the following stepsof the setup/installation properly the information ) :
 Personalize your system by entering your name and organization :
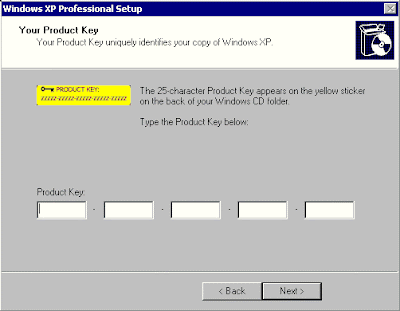 Enter your 25 character Product key (as it was delivered with your Windows XP CD-ROM ) :
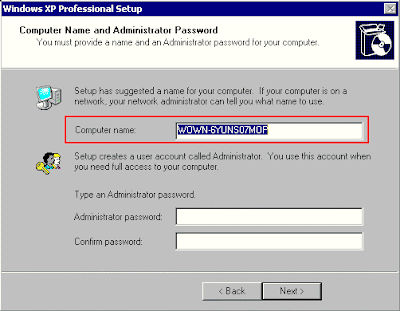 Define the name for your computer and the password for the Administrator account :
based on the organization (define above), Setup creates a name for your computer,with complex name (to make sure that the name will be unique in a network configuration.Since this name will be used later inside the "Network Neighborhood" / "My Network places",change it to an easy to understand , but UNIQUE name (like : P633VM ).
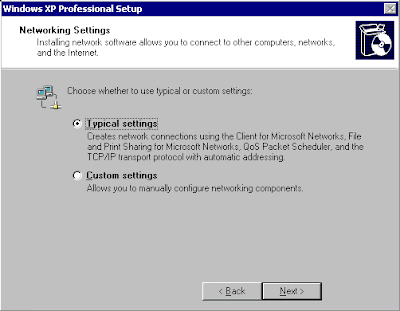
If you have a network card in your system, which was detected by Setup, you will be askedto select whether to install a typical configuration (which you can always change later) or if youlike to make now already special settings (like: defining your IP-address ) :
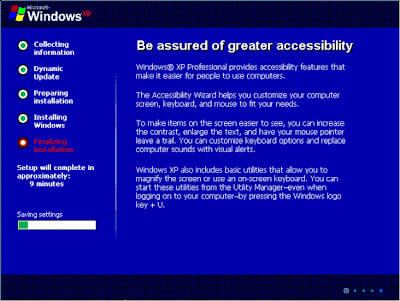
The system will reboot again :
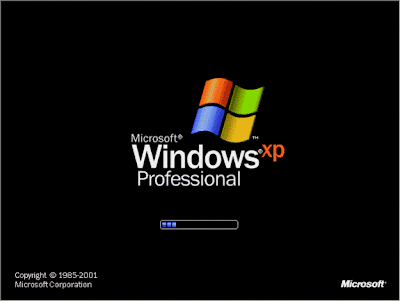 Setup will configure then your screen resolution.
 The system will try to connect via the Internet to the Microsoft website, you can savelyselect to "Skip" that step.You will be prompted to enter the first Usernames (which will be defined as Administrators)and you will get the new XP Welcome screen :
 (note : if only one user was defined during setup and no password was defined, the system will skip theWelcome screen and continue to display immediately the new Windows XP desktop ).
You are now ready to use the"colorful" Windows XP :You can adjust the the system to lookand work more

You are now ready to use the"colorful" Windows XP :You can adjust the the system to lookand work more
Once you have your second partition or second hard disk operational, just insert your Windows Vista DVD, restart the system, and boot from the DVD. Once the system boots from the DVD, Windows Vista’s Setup will begin loading and will display the screen shown in Figure A.
Figure A:

Windows Vista’s Setup will take a few moments to load files before the installation actually commences.
In a few moments, you’ll see the screen that prompts you to choose the regional and language options, as shown in Figure B. As you can see, the default settings are for U.S. and English and if that’s you, you can just click Next to move on.
Figure B:
 The default settings on the regional and language screen are for the U.S. and English.
On the next screen, you’ll be prompted to begin the installation procedure, as shown in Figure C. To begin, just click the Install Now button
Figure C:

In the next screen, you’ll be prompted to type in your product key for activation, as shown in Figure D. By default, the Automatically Activate Windows When I’m online check box is selected; however, you’ll notice that I’ve cleared it. The main reason that I’ve done so here is that while writing this article, I’ve experimented over and over with this installation procedure and want to conserve on the number of times that I can legitimately activate this copy of Windows Vista before Microsoft locks it down and requires me to call in and manually request a new product key.
Figure D:
If you want to keep Vista in a dual-boot configuration, you can activate your license online anytime you want. If you decide to make Vista your main operating system, you can repartition your hard disk, reinstall Vista on the main partition and activate the new installation in the process.
If you decide to disable the automatic activation routine, you’ll see a confirmation dialog box, as shown in Figure E, which contains a harsh warning and prompts you to reconsider. You can just click No to continue.
Figure E:
 Because, I didn’t enter in a product key, Setup doesn’t know what edition I’ve purchased and prompts me to select one of the seven editions on this disk, as shown in Figure F. Since, I'm working with the Ultimate edition, I selected that edition, checked the box, and clicked Next.
On the next page (Figure G), you’ll see the Microsoft Software License Terms and are prompted to read through them. However, unless you’re very curious you can just select the I Accept The License Terms check box and click Next.
Figure G:

If you’re booting from the DVD, when you get to the Which Type Of Installation Do You Want page, the only option is Custom (advanced) as shown in Figure H. To move on, just click the Custom icon.
Figure H:
 When you arrive at the Where Do You Want To Install Windows? page, you’ll see your second partition or second drive. I created a second partition on which to install Windows Vista, so my page looked like the one in Figure I.
Figure I:
 Once the select a partition or disk and click Next, the rest of the installation will continue as it normally would. As such, I won’t follow the installation procedure any further in this article.
Windows Boot Manager
Once the installation is complete, you'll see the Windows Boot Manager screen, as shown in Figure K. As you can see, booting either Windows XP (listed as an Earlier Version of Windows) or Windows Vista is a simple menu choice. This menu will appear on the screen for 30 seconds before Windows Boot Manager launches the default operating system, which is Windows Vista.
 The Activation countdown
Since I described installing Windows Vista without activating it for testing purposes, I wanted to point out that the Windows Vista will indeed keep track of your 30 day trial on the System screen, as shown in Figure K. In addition, it will regularly display.
As I mentioned, the Windows Boot Manager menu will appear on the screen for 30 seconds before Windows Boot Manager launches the default operating system -- Windows Vista. However, if you wish to adjust the countdown or change the default operating system, you can do so from within Windows Vista.
Once you've booted into Windows Vista, press [Windows]+[Break] to access the System page. Next, click the Advance System Setting link in the Tasks pane and confirm though the UAC prompt. When you see the System Properties dialog box, click Settings in the Startup and Recovery panel. You’ll then see the Startup and Recovery dialog box, as shown in Figure L.


 When you get the message to "press any key to boot from CD...", press any key.( this is new on Microsoft Windows 2000 and XP CD's:if you do not press any key, it will NOT boot from CD-ROM,but boot from harddisk, so that people which "forgot" to takeout such bootbable CD-ROM's are not getting confused bythe CD-ROM installation procedure )
 Once the boot from CD-ROM has started, it will display at the top of the screen :"Setup is inspecting your computer's hardware configuration. . ."
 After a brief delay, the typical Microsoft "blue Installation screen" is displayed, with "Windows Setup" displayed at the top and at the bottom of the screen the information,that "Setup is loading Files" (loading all type of device drivers) :
 It will finally state : "Setup is starting Windows" and will display after a short delay the"Windows XP Professional Setup" or "Windows XP Home Setup" screen :
 Select "to set up Windows XP now" and press the ENTER-key :

 (if you install XP into an already existing partition, you have additional options to leave thecurrent disk formatting intact).Select the type of disk formatting : FAT or NTFS
 The system will then need to reboot :
 ( this is a funny screen : the system will restart anyway after 1 seconds, and you have only the choice to press ENTER to shorten the delay, saving max. 15 seconds in the complete installation process of 30-45 minutes )


